Installing ground-mounted solar systems is a simple process that's perfect for those with unused land. We begin with a comprehensive site assessment to determine the most suitable location for your panels, focusing on ideal sunlight exposure. Selecting between fixed, pole-mounted, or tracking systems affects how much energy you can capture. Our planning includes obtaining permits and designing an effective layout. Experienced professionals will secure the structures and calibrate the system to optimize performance. Testing and commissioning guarantee operational readiness. Once installed, routine maintenance keeps systems effective. By building upon this, you'll capture more renewable energy efficiently.
Key Takeaways
- Evaluate site orientation and shading to determine optimal panel placement for maximum sunlight exposure.
- Secure necessary permits and comply with local regulations before beginning the installation process.
- Choose suitable mounting systems, such as fixed or pole-mounted, based on site conditions and energy goals.
- Ensure proper site preparation, including debris removal and soil assessment, for stable anchoring.
- Conduct testing and commissioning to verify system readiness and optimize energy production.
Understanding Ground-Mounted Systems
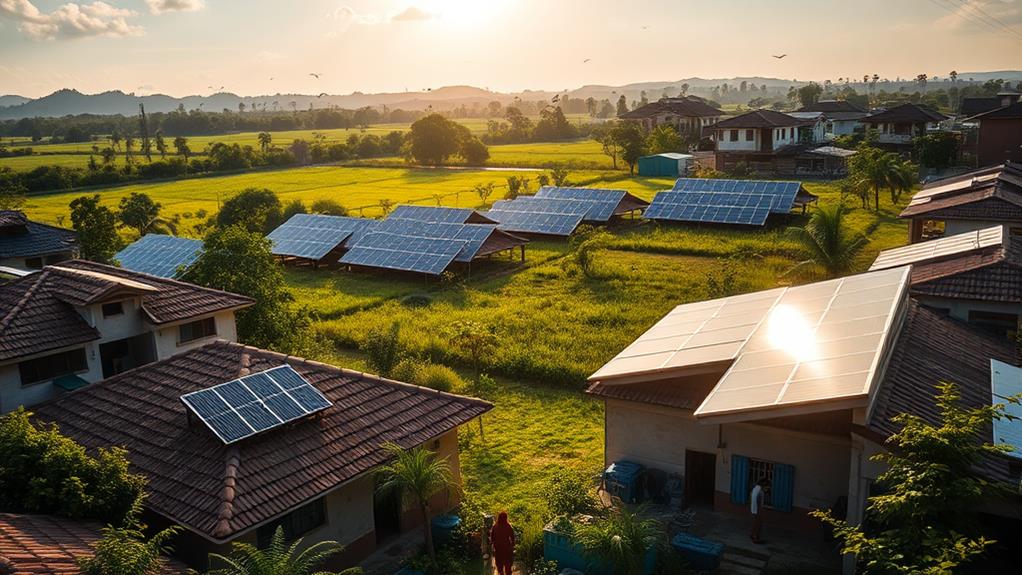
Ground-mounted systems offer an excellent option for optimising solar energy potential, free from the constraints of rooftop installations. Installing solar panels directly on the ground allows for more extensive setups, enhancing energy production. This installation flexibility ensures maximum sun exposure and allows adjustment of the solar panel system's orientation and positioning for optimal results.
The installation process for ground mounts is simple, as it doesn't require any roof modifications, making maintenance and repairs easier. This feature makes ground-mounted systems particularly appealing to those with unused land, offering the chance to produce renewable energy while lowering electricity expenses. Embracing this sustainable choice fosters a sense of community, contributing to a cleaner environment.
Homeowners, farmers, and large property owners find that the solar ground acts as a blank canvas for energy innovation. Ground-mounted systems provide the flexibility to customise solar solutions to specific needs and landscapes, ensuring collective sustainability efforts remain efficient and effective.
For example, the Renogy 320 Watt Monocrystalline Solar Panel is highly recommended for those seeking high performance and durability. Let's harness this power together.
Types of Ground-Mount Panels
Let's discover the different types of ground-mounted panels, starting with fixed and pole-mounted options.
Fixed panels are installed at a set angle and height, offering simplicity and low maintenance, while pole-mounted systems offer more flexibility in height and direction.
For those interested in maximizing energy capture, tracking systems can adjust throughout the day to follow the sun, enhancing efficiency.
Fixed vs. Pole-Mounted
When choosing between fixed-mounted and pole-mounted ground panels, one must consider the advantages and limitations of each type. Fixed-mounted ground-mount solar systems are installed directly on the ground at a set angle, optimising sunlight exposure efficiently. They're simple to install, making them a popular option for those seeking straightforward and reliable energy production. Their immovable nature means adjustments for seasonal changes in sunlight aren't possible, which might limit their effectiveness in certain conditions.
Pole-mounted systems offer adaptability that fixed-mounted panels can't match. Mounted on vertical poles or towers, they allow for adjustable tilt and orientation to better track the sun. This flexibility can enhance energy production, especially in areas where shading is a concern or space is limited. They might require a higher initial investment, with prices in South African Rand reflecting this complexity. Installation can be more intricate, yet they provide a customisable solution catering to specific energy needs and site conditions.
An example of a fixed-mounted panel is the JA Solar 455W Mono PERC panel, known for its efficiency and ease of installation.
On the other hand, the SunPower Performance 3 AC module is recommended for those opting for pole-mounted systems, offering advanced tracking capabilities. Understanding these distinctions aids in making informed decisions aligned with community goals and environmental aspirations.
Tracking System Options
Tracking systems for ground-mounted solar panels include two primary choices: single-axis and dual-axis systems. Single-axis tracking systems adjust along one axis, typically moving from east to west. They enhance energy capture throughout the day, keeping panels aligned with the sun's path. This option is ideal when working within a limited budget or space, yet aiming for better energy capture compared to fixed systems. Consider the Soltec SF7 single-axis solar tracker, which offers efficient energy capture and is well-suited for tighter budgets.
Dual-axis tracking systems adjust along both vertical and horizontal axes, yielding the highest energy production due to their ability to track the sun's position more precisely. With ample space and a larger budget, dual-axis systems can significantly boost solar output, making them suitable for projects where maximising efficiency and sunlight exposure is vital. The Mecasolar Dual-Axis Tracker is a prime example, providing robust performance and optimal energy generation for larger installations.
When choosing between these systems, consider budget constraints, available space, and desired energy output. Selecting the appropriate system can contribute to a more sustainable future and reinforce our commitment to renewable energy. Opting for the right system aligns with our shared goals for sustainability and efficiency.
Site Assessment and Preparation
As we move forward with installing ground-mounted systems, evaluating the site is essential for ensuring optimal sunlight positioning and assessing soil and obstacles.
We'll need to identify any shading from nearby trees or structures that could impact energy production.
Let's also inspect the soil to confirm it can support the mounting structures securely.
Optimal Sunlight Positioning
Determining the best positioning for sunlight exposure is crucial in the assessment and preparation of ground-mounted solar systems. Maximising the energy output of solar panels requires careful consideration of sunlight positioning, optimal tilt angles, and site preparation. South-facing panels capture the most sunlight, enhancing energy production. The assessment focuses on evaluating the orientation, slope, and potential shading of the selected location.
In preparing the site, emphasis is on the adaptability of ground-mounted systems. This flexibility allows for adjustments in panel placement and alignment to suit the unique characteristics of the space, ensuring efficient sunlight capture throughout the day. Clearing debris and preparing the ground are vital for achieving optimal tilt angles, which are important for long-term performance.
For example, the Renogy 100 Watt 12 Volt Monocrystalline Solar Panel is a popular choice for its efficiency and durability. Proper tilt angles can be calculated using online solar angle calculators, which recommend adjustments based on latitude.
Additionally, professional-grade tools, such as the Solar Pathfinder, assist in analysing potential shading issues effectively.
Soil and Obstacle Evaluation
With optimal sunlight positioning confirmed, attention now shifts to the ground itself. We begin with soil and obstacle evaluation. As a community keen to enhance our energy solutions, we understand the importance of a comprehensive site assessment. This step is vital for determining the ideal placement of our ground-mounted system.
The soil assessment involves examining the health and composition of the soil. These factors are crucial for ensuring anchoring stability and system longevity. Healthy soil supports the system's foundation, assuring us that our investment is built to last. For instance, a loamy soil with good drainage properties is ideal for supporting the structure and preventing waterlogging.
Obstacle evaluation follows. Identifying potential barriers like trees or nearby structures helps avoid shading issues and maximises sunlight exposure. Considering site orientation and slope further refines the system's efficiency and energy production. Each element contributes to creating an environment where panels can perform optimally.
For products, consider using the Renusol FS10+ system, which is known for its compatibility with diverse soil types and its robust anchoring capabilities. It ensures that even in less-than-ideal conditions, your panels remain stable and efficient.
Planning and Design Process
In setting up ground-mounted solar panels, success begins with a comprehensive planning and design process. We start with assessing site orientation, slope, and potential shading. These factors determine optimal panel placement. Accurate calculations guide us in deciding the number of panels required to meet energy needs and how to best arrange them for maximum performance.
Selecting the appropriate mounting systems is crucial for stability and efficiency. We ensure our choices are suitable for the specific conditions of the site, contributing to the overall success of the solar installation. Planning also includes focusing on electrical connections and grid integration, essential components that ensure the system operates smoothly with existing infrastructure.
Establishing a clear timeline keeps the project on track. Tasks range from excavating holes for the mounts to securing panels and connecting to the grid. Each step is carefully planned.
After installation, thorough testing is conducted, settings are adjusted as needed, and detailed documentation is prepared to verify system performance. Collaboration ensures a smooth, efficient, and successful installation.
Installation Steps
Having established a robust foundation through careful planning and design, attention now shifts to the installation steps for ground-mounted solar panels. A structured approach will turn this vision into reality. Initially, a comprehensive site assessment identifies the optimal location and orientation for the panels, ensuring maximum energy capture from the sun. Detailed design planning and securing necessary permits are crucial before commencing any physical work.
Once prepared, installation begins with site clearing to accommodate the ground mount system. Skilled professionals, including electricians and solar installers, manage this critical phase. Secure anchoring of mounting structures is crucial, set at an angle to optimise solar exposure.
Following this, the solar panel systems are attached to these structures, with precise calibration to enhance performance.
Testing and Commissioning
Let's enter the crucial stage of testing and commissioning to verify our ground-mounted solar system's readiness. This phase ensures every component operates seamlessly before making that essential grid connection. During testing, we conduct thorough operational checks, making sure each part functions correctly. It's not just about turning the system on; it's about confirming everything works as it should from the outset.
Commissioning involves fine-tuning the system for optimal performance. Settings are adjusted and connections to the electrical grid are verified to ensure everything is perfect. Monitoring initial energy production metrics is vital, offering a snapshot of the system's efficiency. This provides our first insight into how well our solar panels convert sunlight into usable energy.
Post-commissioning, we meticulously document system performance. This record-keeping isn't merely paperwork; it's an essential resource for future reference, ensuring our system operates safely and efficiently over its lifetime. Working through these steps together means we aren't just installing solar power; we're building a reliable and efficient energy solution for our community. Let's make certain our efforts shine brightly from the beginning.
Maintenance and Upkeep
As we move into the maintenance and upkeep phase, regular attention to our ground-mounted solar system is vital for sustaining its efficiency and performance. Let's unite in ensuring our investment continues to shine. A proactive approach with our maintenance tasks maximises energy output and fosters a sense of community in caring for our shared environment.
Regular cleaning of ground-mounted solar panels is essential. Dust, dirt, and other debris can greatly affect their efficiency. Ensuring they're clean maintains optimal performance and energy production.
Close monitoring of system performance allows us to identify any dips in energy levels, signalling potential issues that might require timely repairs. Whether it's replacing a damaged panel or fixing electrical components, addressing these promptly keeps our system operating at its best.
Scheduled inspections play a critical role in preventing long-term issues. Checking for physical damage and ensuring vegetation doesn't obstruct sunlight protect our system from unnecessary wear and tear.
Following a well-planned maintenance schedule not only helps us achieve peak efficiency but also prolongs the lifespan of our solar panels. Together, we can enjoy the benefits of a well-maintained solar system for years to come.
Key Considerations and Challenges
Considering ground-mounted solar systems requires an understanding of the unique challenges involved. Initial costs tend to be higher as structural support is necessary to stabilise the panels and cover installation labour, contributing to the expense. It's crucial to address local regulations and permits early, as supporting structures must comply with local laws.
Shading issues can significantly impact energy production. Nearby trees or buildings may cast shadows, requiring careful planning to maximise sunlight exposure. Homeowners associations might impose restrictions on ground-mounted systems, complicating plans further. Limited yard space can constrain installation options, necessitating the wise use of available area.
For instance, the Renogy 100 Watt 12 Volt Solar Panel is a suitable option for those with space constraints, offering efficiency in smaller areas. It's essential to consider these factors to ensure optimal energy output and compliance with local requirements.
Conclusion
Here's a straightforward guide to setting up ground-mounted solar systems. We've covered everything from understanding different types of panels to planning, installing, and maintaining your system. By following these steps, you can achieve a successful installation tailored to your specific location. Remember, a thorough site evaluation and careful planning are crucial, as well as ongoing maintenance.
We at Deo Solar are here to assist you further. If you have any questions about our products, such as Rail-Less Solar Brackets, End Spacers, Structural Brackets, Ground Mounted Solar Systems, Corrugated Brackets, or Earthing Plates, please don't hesitate to contact us. We also offer services like the DeoSizer Tool, Evaluation and Design, Maintenance and Support, and Solar Installations. Feel free to reach out to us for any assistance or inquiries.