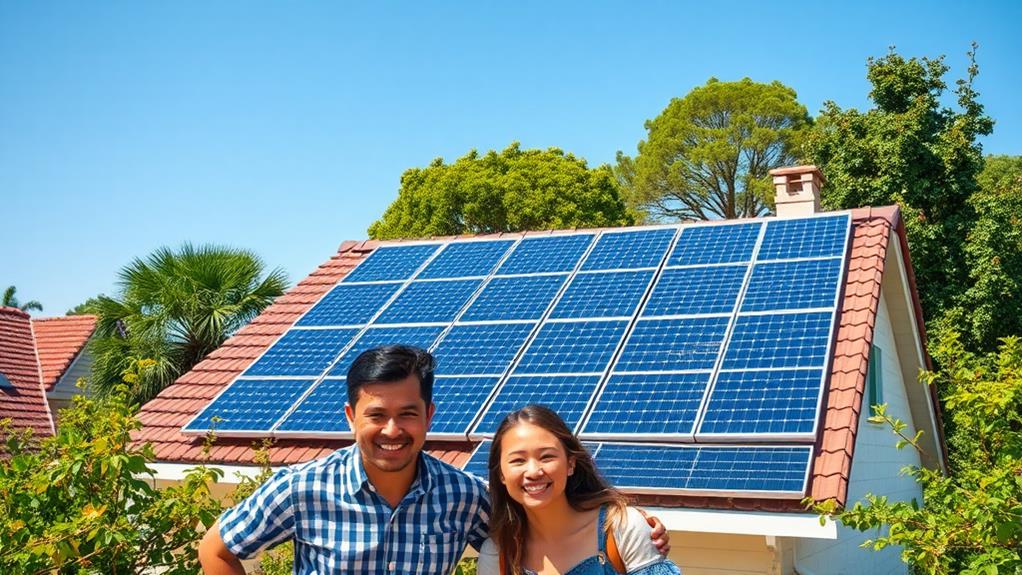
We’re upgrading to solar power, and we’re taking it one step at a time.
Firstly, we assess our roof’s suitability, considering size, orientation, and shading obstacles.
Next, we set up scaffolding and attach mounts, ensuring a sturdy foundation for our solar array.
We then install solar panels, add optimisers to address shading issues, and connect the inverter system, converting DC power to AC electricity.
Assessing Your Roof’s Suitability
We assess our roof’s suitability for solar panels by examining its size, orientation, and condition.
A thorough evaluation of the roof’s dimensions is crucial to ensure there’s sufficient space to accommodate the panels.
The roof’s orientation is also vital, as it significantly impacts energy production. Ideally, a south-facing roof is preferred, but east- or west-facing roofs can also be suitable.
A shading analysis is then conducted to identify any obstacles that could block sunlight from reaching the panels.
This involves checking for trees, neighbouring buildings, or features like chimneys that could cast a shadow on the roof.
By doing so, we can determine the optimal placement of the panels to maximise energy production.
Understanding our roof’s limitations is essential to avoid potential issues and ensure the solar panel system operates efficiently and effectively.
Setting Up Scaffolding and Mounts
With the roof assessment complete, our next step is to erect scaffolding, a crucial measure that ensures safe access to the roof for the installation process.
This meticulous process, which takes around half a day to complete, is vital for maintaining Scaffolding Safety, thus giving us peace of mind when working at heights. Our professional installer will carefully construct the scaffolding, ensuring it’s sturdy and secure.
Once the scaffolding is in place, we’ll attach the mounts to the roof or wall.
These Mounting Innovations serve as the foundation for the solar array, providing a solid base for the panels. The type of mount we use depends on the roof type, with options including rail-mounted, ballasted, and penetrating mounts.
For instance, a rail-mounted system is ideal for pitched roofs, while a ballasted system is suitable for flat roofs. We’ll secure them with high-quality bolts and nuts, confirming they’re firmly in place.
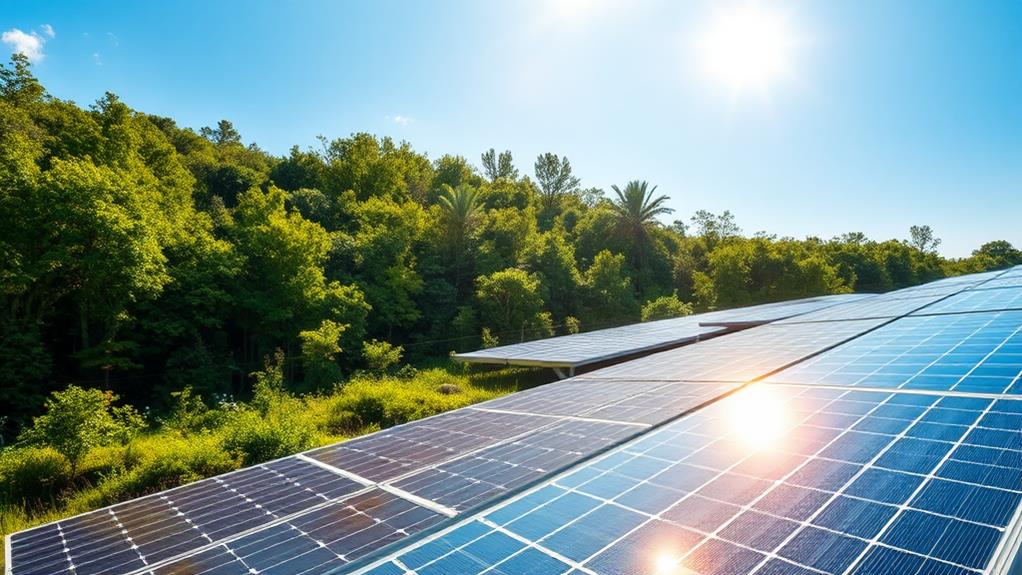
Next, we’ll angle the mounts between 18-36 degrees to optimize sunlight exposure and energy production, thereby maximizing the solar panels’ efficiency.
With the scaffolding and mounts in place, we’re one step closer to harnessing the power of the sun.
Installing Solar Panels and Wiring
As we move forward with our solar upgrade, we’re excited to tackle the next pivotal step: installing solar panels and wiring.
Now that we’ve set up our scaffolding and mounts, it’s time to focus on placing our panels in the optimal position, wiring them up correctly, and securing the entire system.
We’ll examine the key considerations for each of these tasks to guarantee our solar setup is both efficient and safe.
Panel Placement Considerations
When installing solar panels, careful consideration must be given to the placement of each panel to optimise energy output, taking into account the unique characteristics of the roof and the surrounding environment.
A thorough shading analysis is crucial to identify potential issues that could impact energy efficiency. This involves assessing the roof’s layout, considering obstacles such as trees, chimneys, and vents that could cast shadows on the panels.
By doing so, the panels can be strategically positioned to optimise sunlight exposure and minimise energy losses.
Optimisers can be added to the system to address shading issues. These devices enable each panel to operate independently, ensuring that the entire system doesn’t suffer from reduced energy output due to shading.
For instance, the SolarEdge optimiser is a popular choice for its ability to maximise energy production. By taking a customised approach, tailored to specific energy needs and roof typology, it’s possible to guarantee the solar panel system operates at peak efficiency.
Wiring and Connectors Explained
When connecting solar panels to the electrical grid, a complex network of wires and connectors is required, necessitating meticulous planning and execution to ensure a safe and efficient energy flow. It is essential to prioritise safety and efficiency during the wiring process to avoid electrical shock, fire hazards, or system failure, which is why a professional installer should carry out the wiring process.
| Wiring Configuration | Series | Parallel |
|---|---|---|
| Advantages | Higher voltage, lower current, ideal for large-scale commercial applications | Higher current, lower voltage, suitable for residential systems and smaller setups |
| Disadvantages | More complex, higher cost, and prone to reduced output during partial shading | More susceptible to shading, but provides greater flexibility |
| Ideal For | Large systems, commercial use, and industrial applications | Residential systems, smaller setups, and remote power systems |
When installing inverters, it is crucial to verify they are installed in a cool, well-ventilated area to improve efficiency and prolong their lifespan. For systems with a solar battery, a hybrid inverter is necessary, and the installer should confirm the inverter is compatible with the battery and the rest of the system. By adhering to electrical codes and creating detailed wiring diagrams, we can guarantee a safe and efficient connection to the consumer unit, controlling energy distribution throughout the home. For instance, the SMA Sunny Boy inverter is a reliable option for residential systems, while the Fronius Symo inverter is suitable for commercial applications.
Mounting and Securing Systems
We secure our solar panels to the roof or wall using mounts, which serve as the foundation of the solar array and are typically tilted between 18-36 degrees to optimise sunlight exposure. This ensures maximum energy production and structural integrity, as a tilted angle allows for snow to slide off and facilitates cleaning.
To confirm a successful installation, we follow these key steps:
Conduct an environmental assessment: Identify potential shading issues, such as nearby trees or buildings, and consider adding optimisers to counteract their impact. For instance, the Tigo TS4-A-2F optimiser can be used to mitigate shading effects.
Attach mounting brackets: Secure them directly to the rafters for maximum strength and stability, verifying the roof’s load-bearing capacity can support the weight of the solar panels and mounting system. This ensures the system can withstand various weather conditions, including high winds and heavy snow.
Mount rails and secure panels: Align and level the rails, then attach the solar panels using clamps, and connect the wiring according to the electrical design. For example, the Renusol CS10 rail system provides a secure and flexible solution for mounting solar panels.
Connecting the Solar Inverter System
With the solar panels securely mounted, we proceed to connect the solar inverter system, a crucial component that converts DC power into usable AC electricity.
The inverter’s compatibility with the solar panel system is paramount, as it directly impacts the system’s performance and efficiency. To ensure seamless integration, we meticulously check the inverter’s specifications against the solar panel system’s requirements.
Next, we carefully connect the inverter to the solar panels, adhering strictly to the manufacturer’s instructions. Effective system integration is vital at this stage, as it enables the inverter to communicate accurately with the panels.
We take our time, methodically connecting cables and wiring, ensuring everything is securely fastened to prevent any electrical faults.
Upon completing this step, we take satisfaction in knowing that our solar inverter system is one step closer to generating clean, renewable energy. With the inverter connected and integrated, we’re ready to progress to the next stage of our solar upgrade journey.
Bonding the Inverter and Battery
Bonding the Inverter and Battery
With the solar inverter system operational, the focus shifts to bonding the inverter and battery, a crucial step in ensuring a seamless and efficient energy storage and retrieval process. This critical procedure guarantees a safe and efficient flow of electrical energy between the two components, thereby preventing electrical shocks, damage, or system failures.
To achieve this, electrical safety and grounding methods take centre stage.
Firstly, connect the inverter’s negative terminal to the battery’s negative terminal, thereby creating a secure electrical bond between the two components. This connection enables efficient energy transfer and maintains system stability.
Secondly, ground the inverter and battery to a common earth ground, ensuring both components are at the same electrical potential. This crucial step reduces the risk of electrical shock or damage, guaranteeing the system’s safety and reliability.
Lastly, verify the bonding connection using a multimeter to confirm the connection’s security and detect any electrical leaks or shorts that could compromise the system’s safety and performance. This final step provides assurance that the bonding process has been successful, and the system is ready for efficient energy storage and retrieval.
Testing the Solar Panel System
As we near the finish line of our solar panel installation, it’s time to put our system to the test.
We’re going to start by conducting a thorough system inspection to verify everything is installed correctly.
Next, we’ll evaluate the system’s performance, tracking its energy output and identifying any areas for improvement.
System Inspection
We conduct a meticulous inspection of the solar panel system to ensure a safe, efficient, and high-performing installation that meets our design specifications and UK wiring regulations.
This crucial step is essential because it validates our Quality Control measures and upholds our Safety Protocols.
During the inspection, we focus on three key areas:
Mounting and fixtures: We verify that all solar panels are securely mounted, with all racking systems correctly aligned and tightened, to prevent any potential hazards or system failures.
Electrical installations: We scrutinize the wiring, conduits, and connections for neatness, proper routing, and compliance with the UK’s wiring regulations (BS 7671), ensuring the system’s electrical integrity and preventing potential electrical hazards.
System output: We measure the system’s output under normal operating conditions to confirm it meets the expected performance levels based on the system’s design specifications, guaranteeing optimal energy generation and a worthwhile investment for our clients.
Performance Evaluation
After conducting a meticulous inspection to verify the integrity of the installation, we proceed to the critical phase of testing the solar panel system to confirm its expected performance.
This phase is crucial as it ensures the system produces the anticipated amount of energy safely and efficiently. We measure the system’s output under normal operating conditions to confirm it meets the expected performance levels based on the system’s design specifications.
This is vital to ensure the system operates within its intended parameters. A re-verification of the shading analysis is also conducted to confirm that no unexpected shading impacts the system’s performance.
Furthermore, we test the monitoring system to confirm its accuracy in tracking and reporting the system’s performance data, enabling us to fine-tune the system calibration and optimize its energy efficiency.
This meticulous process ensures a solar panel system that operates smoothly, efficiently, and safely. Finally, our installer provides an MCS certificate, a vital document required for compliance and connection to the grid, as well as eligibility for available feed-in tariffs or smart export guarantees.
Final Inspection and Maintenance
Before commissioning the solar installation, we conduct a meticulous final inspection to ensure the system meets the expected performance levels and safety standards. This critical phase is crucial as it guarantees the system’s reliability and energy efficiency. We test the system’s output under normal operating conditions to confirm it meets the design specifications.
The key aspects we focus on during the final inspection are:
- System performance: We measure the system’s output to verify it meets the expected levels based on the design specifications, ensuring optimal energy generation.
- Monitoring system: We test the monitoring system to confirm it accurately tracks and reports the system’s performance data, providing valuable insights for future maintenance and upgrades.
- Shading analysis: We re-verify the shading analysis to confirm no unexpected shading impacts the system’s performance, ensuring the system operates at maximum capacity.
Regular maintenance is vital to optimal system performance. To ensure the system operates at peak efficiency, we schedule regular cleaning of the solar panels to remove dirt and debris. This prevents energy losses and prolongs the system’s lifespan.